3D painting is an incredible creative outlet that allows artists to bring their unique designs to life. Notably, some artists even take their printed 3D models and offer them to the public. In this article, we'll explore the remarkable work of Greedy 3D, a dedicated YouTuber specializing in 3D painting and creations. Greedy 3D recently used the Neoeco NCT-SJ83 airbrush in conjunction with a NCT-200K compressor to paint an alien egg, achieving impressive results through a straightforward process. Let's delve into the details of this exciting project.

List of Materials Used
Neoeco Universal Cleaning Pot (1)
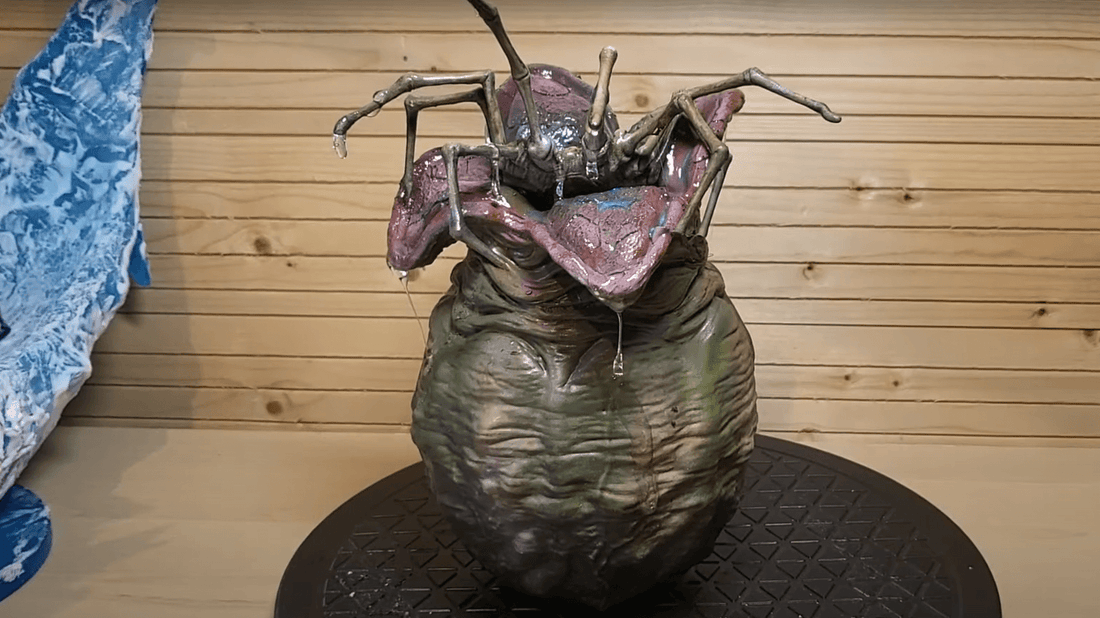
Alien Egg (1)
Matte Black Color Primer (1)
Bullwhack Brown Color Paint (1)
Charred Bone Paint (1)
Angel Green Paint (1)
Earth Shade Paint (1)
Green Glow Paint (1)
Pure Red Paint (1)
Fey Pink Paint (1)
Metal Varnish (1)
Leather Brown Paint (1)
Bleached Bone Paint (1)
Skeleton Bone Paint (1)
Gloss Varnish (1)
Soft Tone Washes (1)
Martian Brown Paint (1)
Liquid Mask (1)
Desert Highlights (1)
UV Resin (1)
Brushes (3)
Airbrush Thinner (1)
Clear Resin for Egg Drool (1)
Liquid Mask (1)
The Process
-
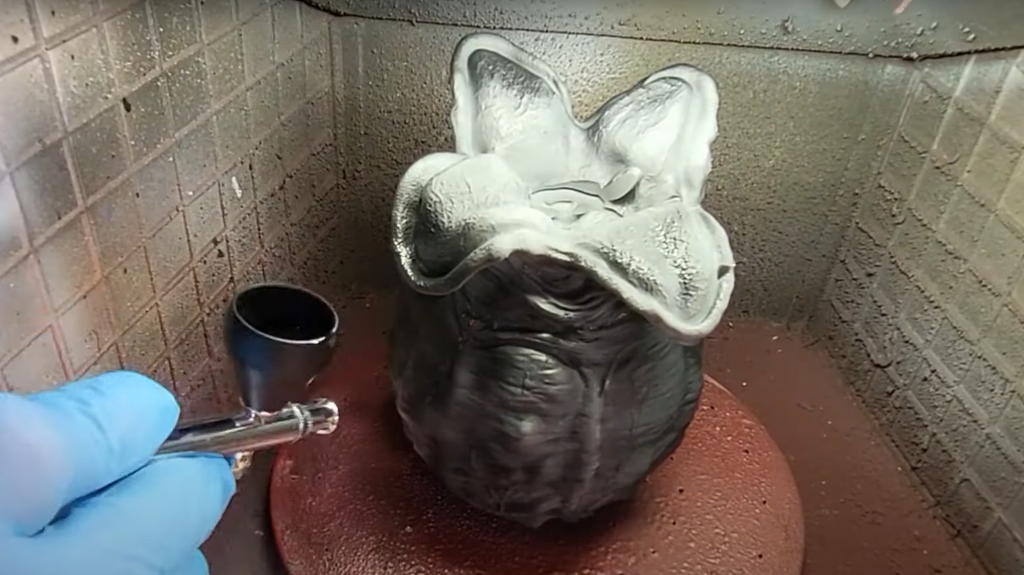
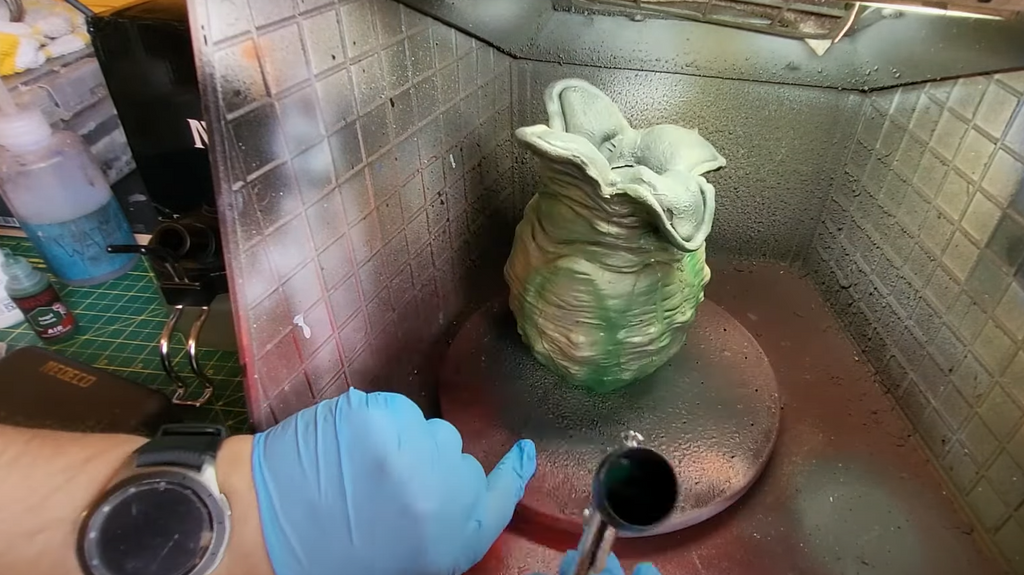
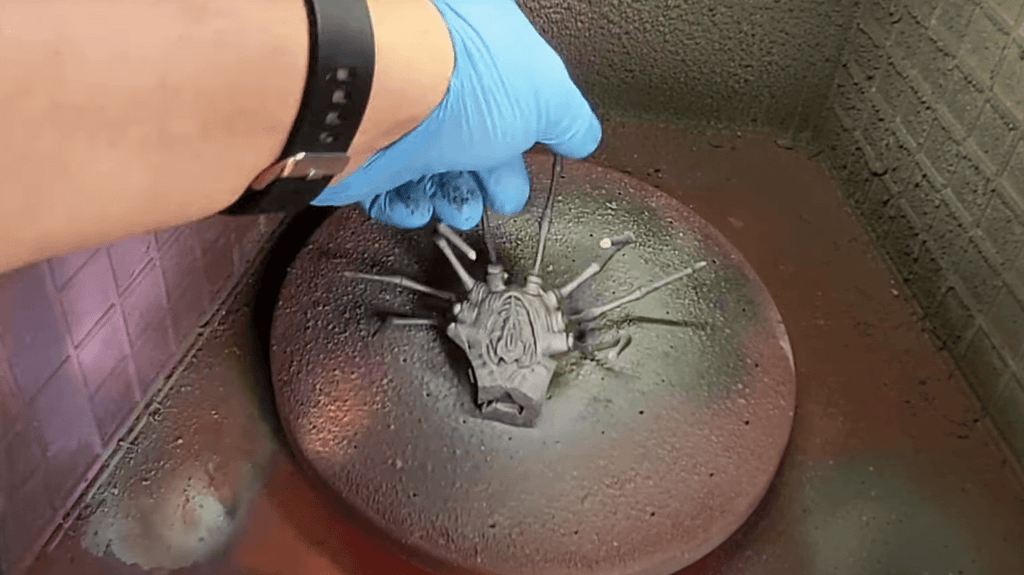
Applying the Primer: The project began by applying a black primer to the model using the SJ83 airbrush, ensuring an even and complete black layer.
-
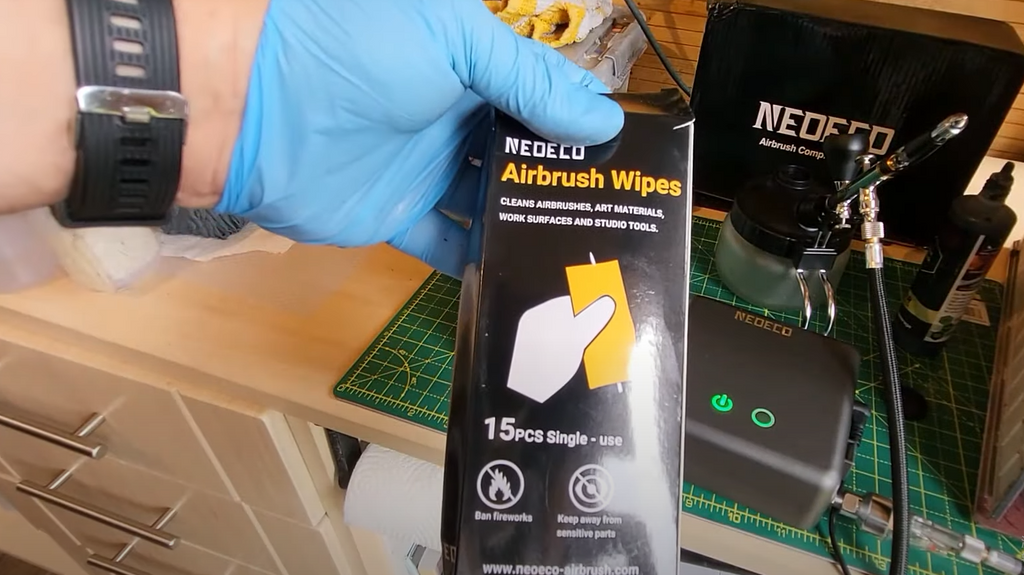
Cleaning the Airbrush:Before switching to a different color, thorough airbrush cleaning was essential to prevent color contamination. Neoeco airbrush wipes were used for efficient cup cleaning.
-
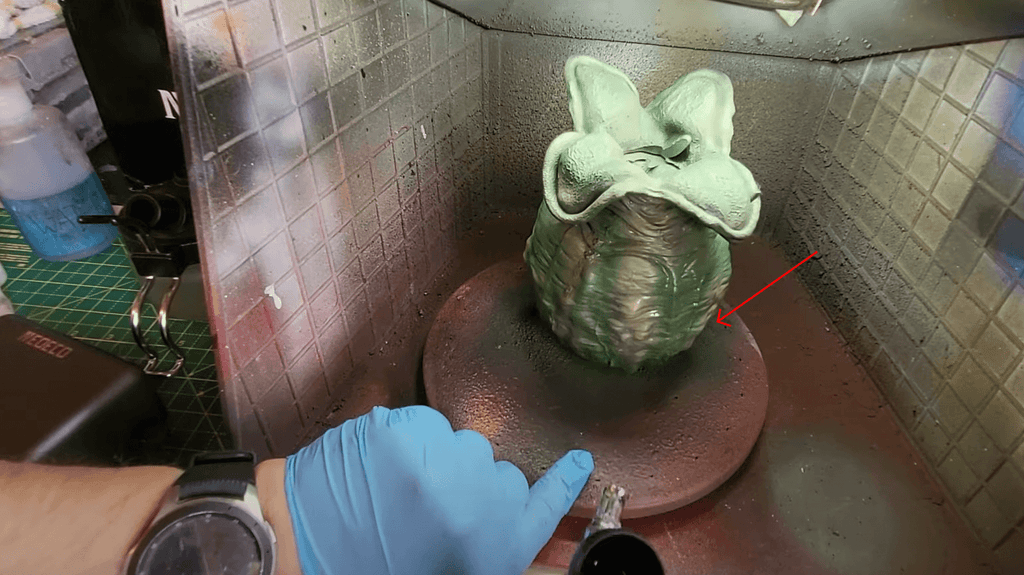
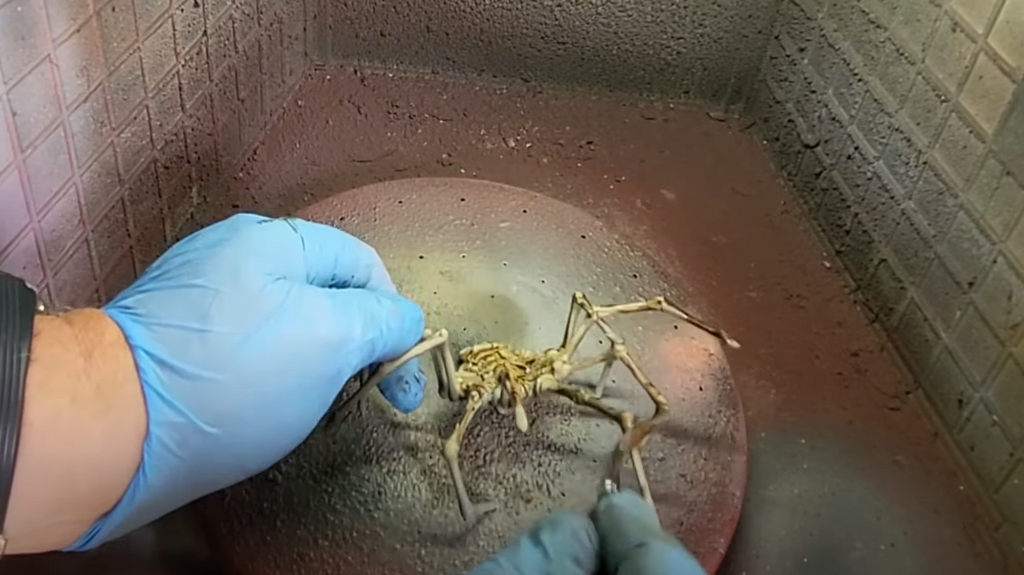
Adding Color:To introduce color to the alien egg, Bullwhack Brown paint was used, mixed with a few drops of thinner for the right consistency. Charred Bone paint followed, covering the egg while allowing some black to show through for contrast.
-
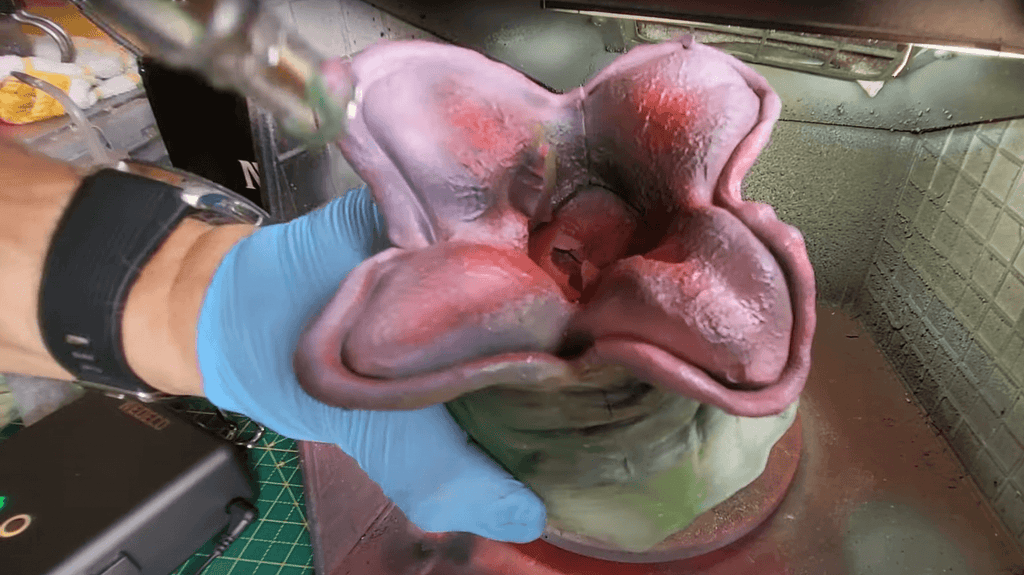
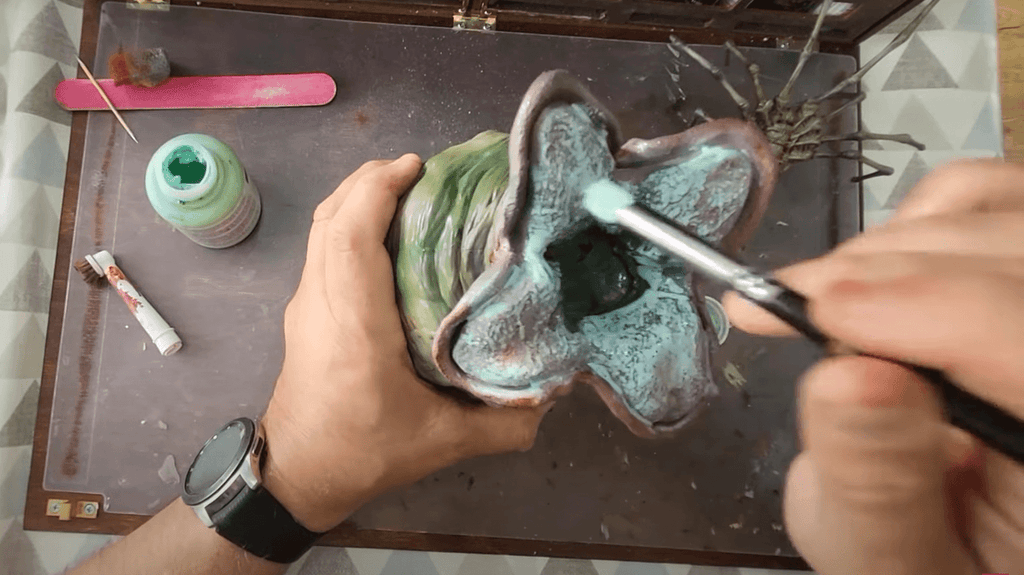
Emphasizing Veins: Angel Green paint was used to emphasize veins on the egg's surface, enhancing its visual appeal.
-
Creating Shadows:Earth Shade paint was applied to create a shadowy effect at the base of the egg, adding depth.
-
Adding Vibrancy: Green Glow paint was reapplied to liven up the egg's appearance.
-
Introducing Red: Pure Red paint was used on the top of the egg to create a focal point, leaving room for further adjustments.
-
Toning Down with Fey Pink:To balance the red, Fey Pink paint was applied around the edges, preserving the red center.
-
Enhancing the Center: Angel Branches paint was used at the center, with a touch of green to add dimension.
-
Realism with Washes:Washes were applied, followed by a layer of metal varnish to provide a glossy finish and protect the painted layers.
-
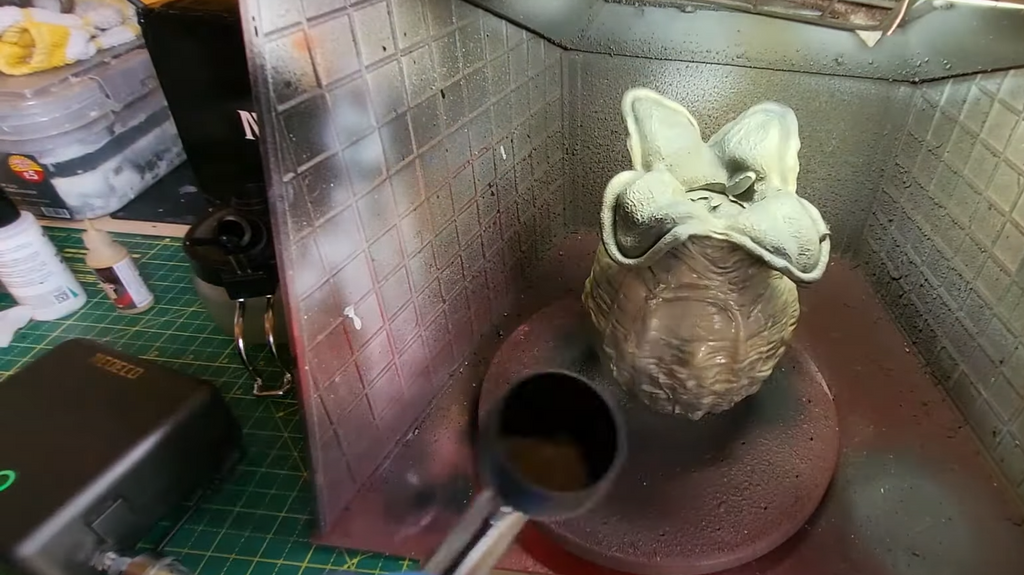
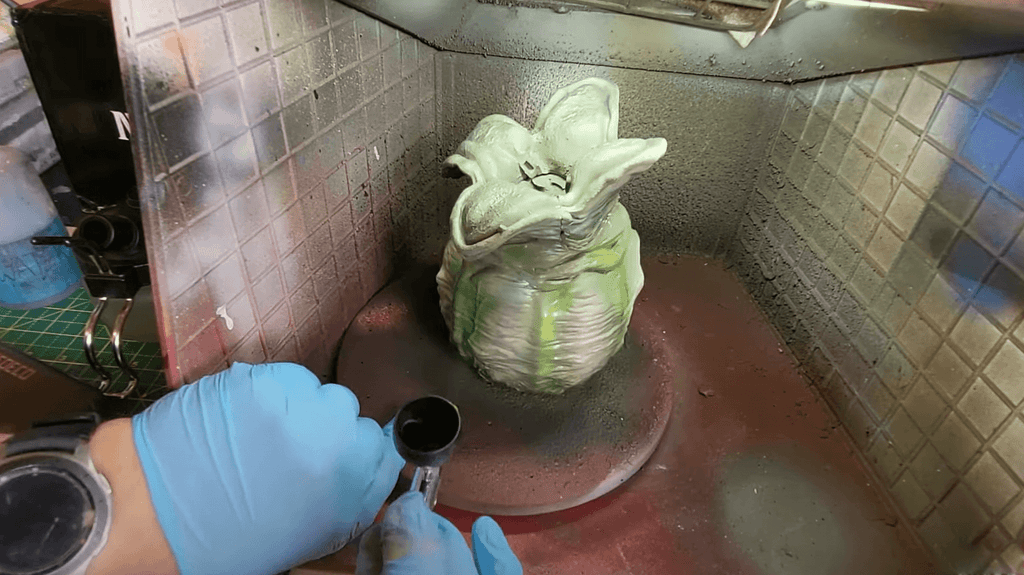
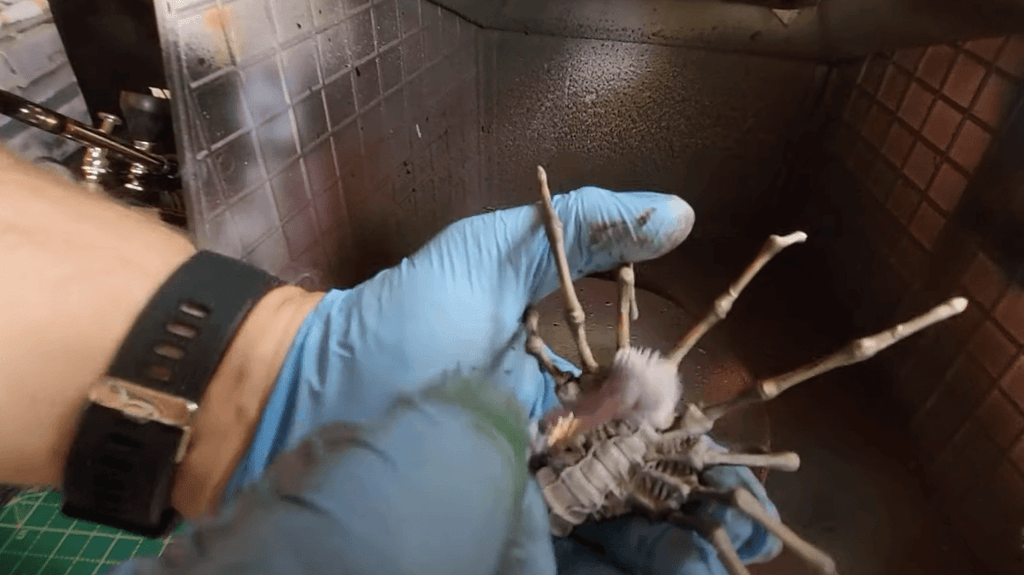
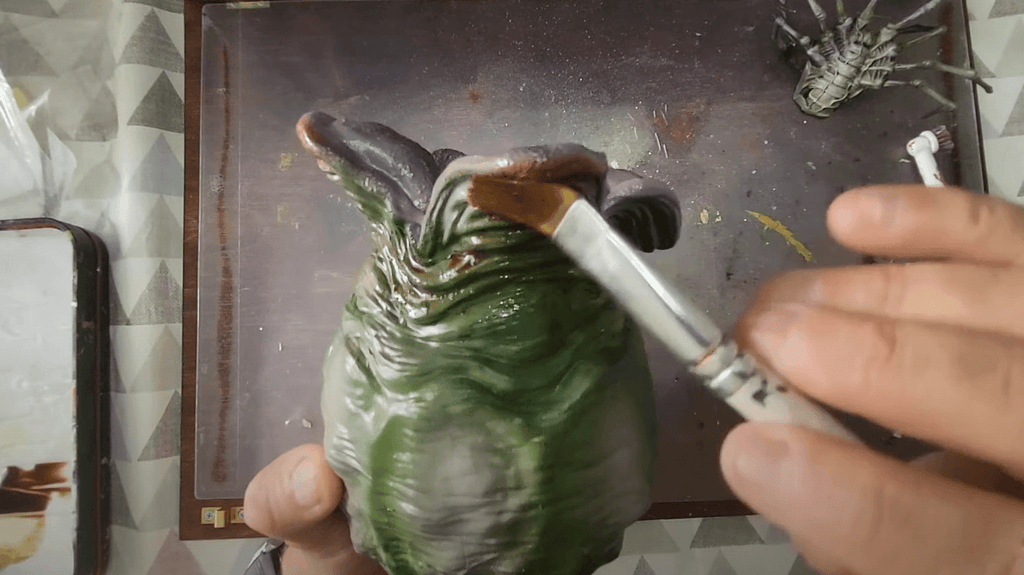
Base Layer: Leather Brown paint was applied broadly, creating a solid brown base all over the egg.
-
Lightening Up:Bleached Bone paint lightened the overall appearance of the egg.
-
Shading with Earth Shade: Earth Shade paint was meticulously applied to various areas, with excess paint wiped away using a tissue.
-
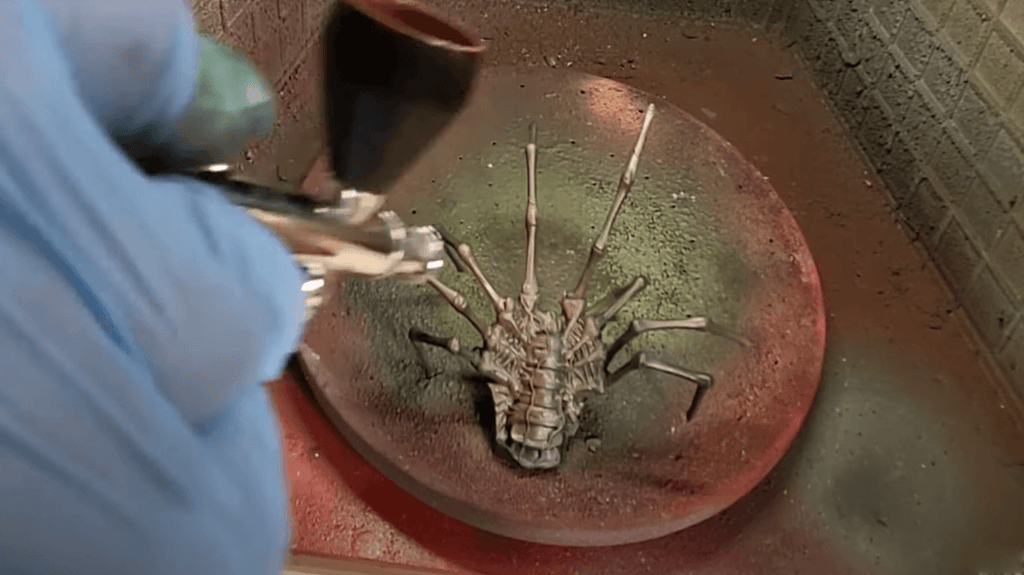
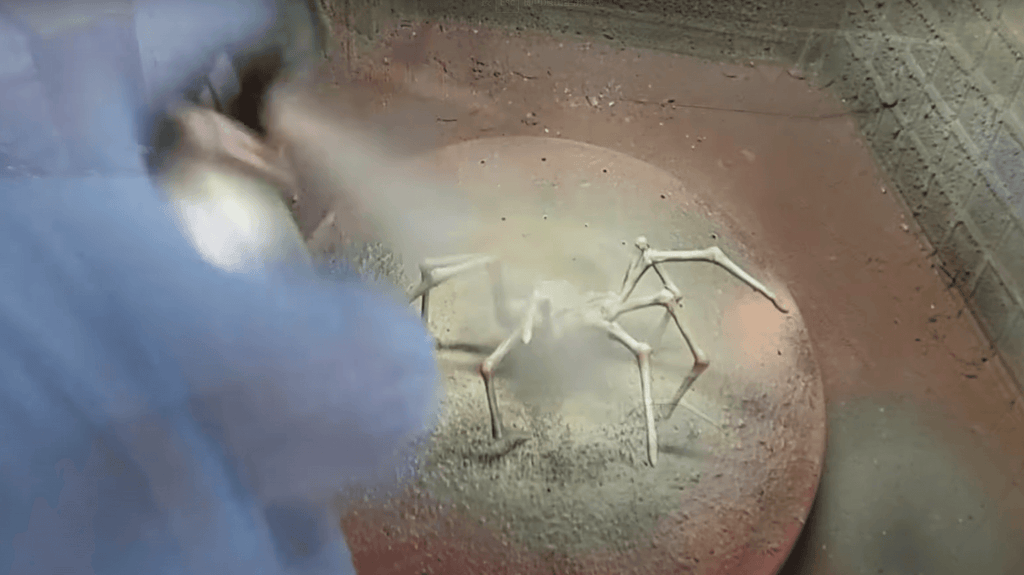
Dry Brushing for Texture: Dry brushing techniques were employed to add texture using Skeleton Bone color.
-
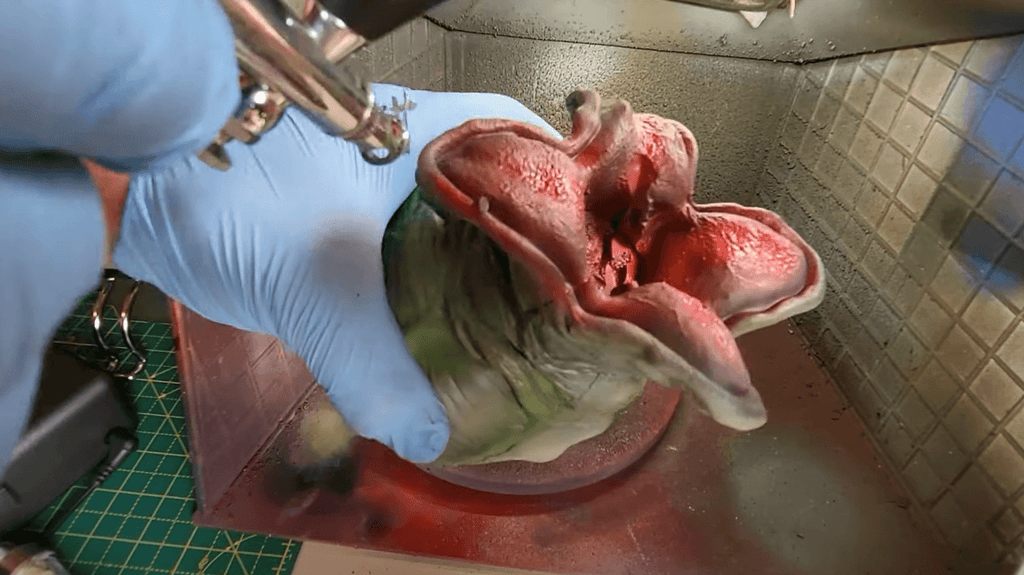
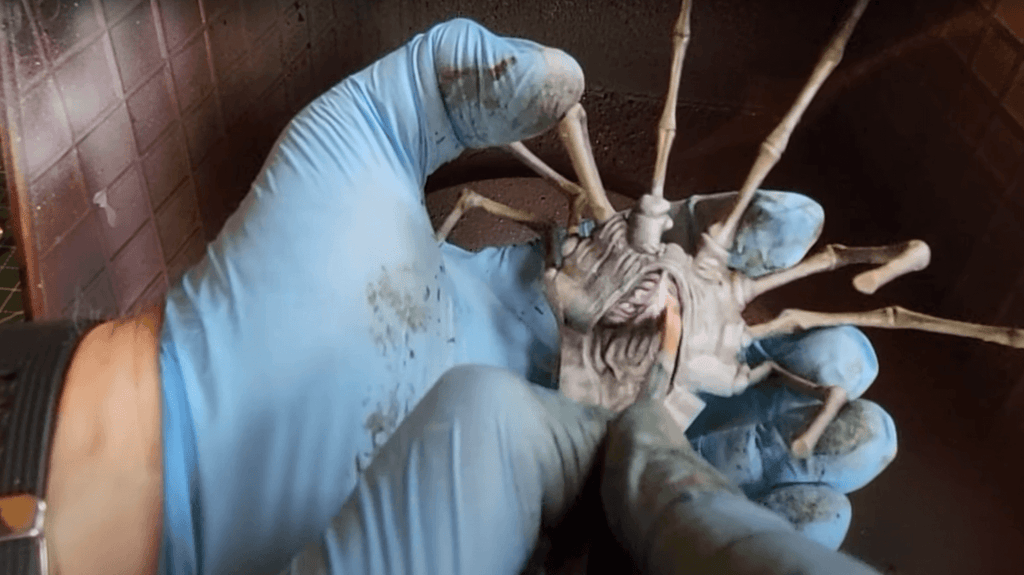
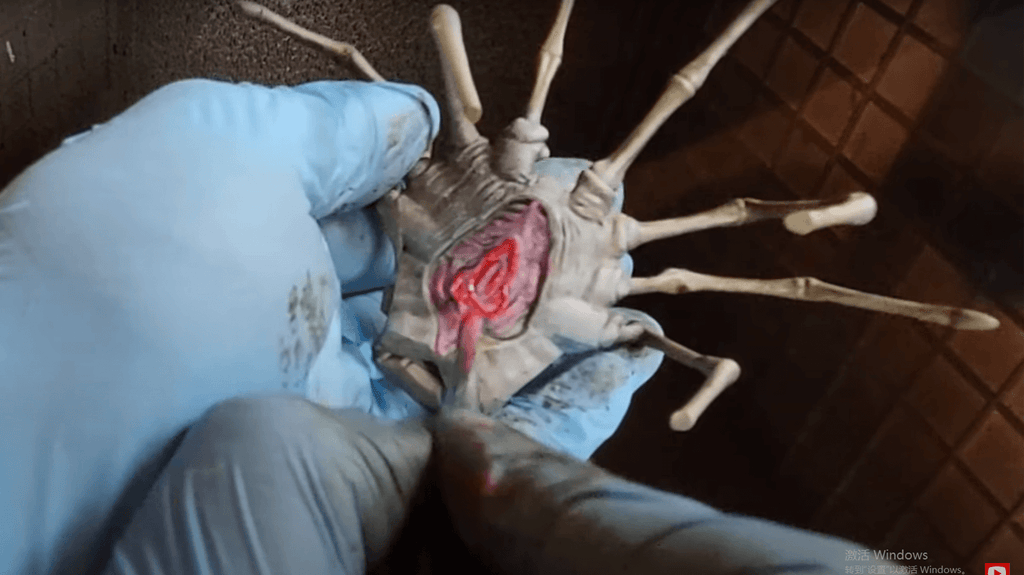
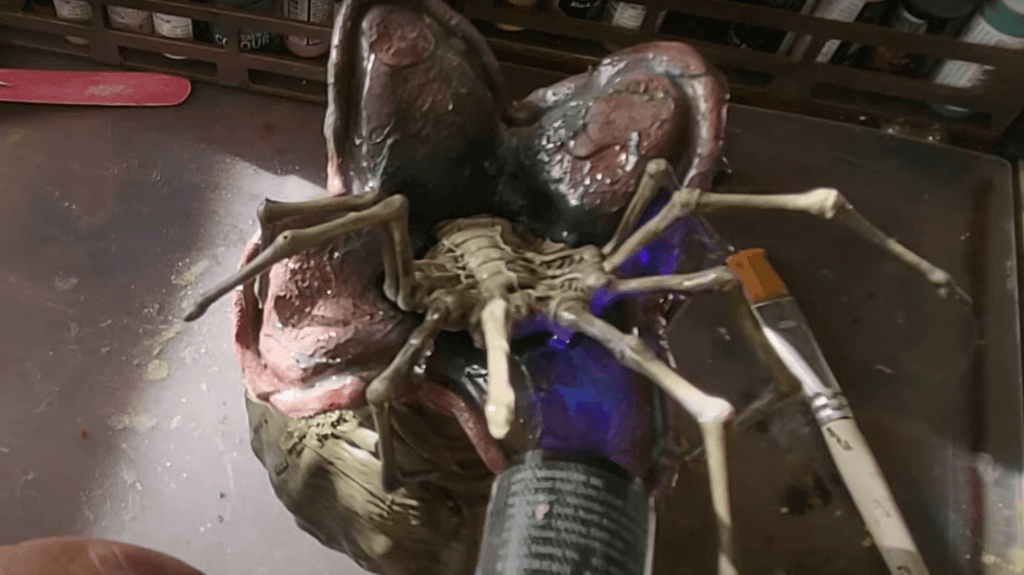
Adding Detail:Fey Pink paint was delicately applied to the interior section of the facehugger's protrusion, followed by a touch of red. The colors were merged using a dry brush.
-
Highlighting Legs: A light color, Bleached Bone, was dry brushed across the outer legs of the facehugger.
-
Protective Varnish:Gloss varnish was applied as a protective layer to safeguard the paintwork from smudging.
-
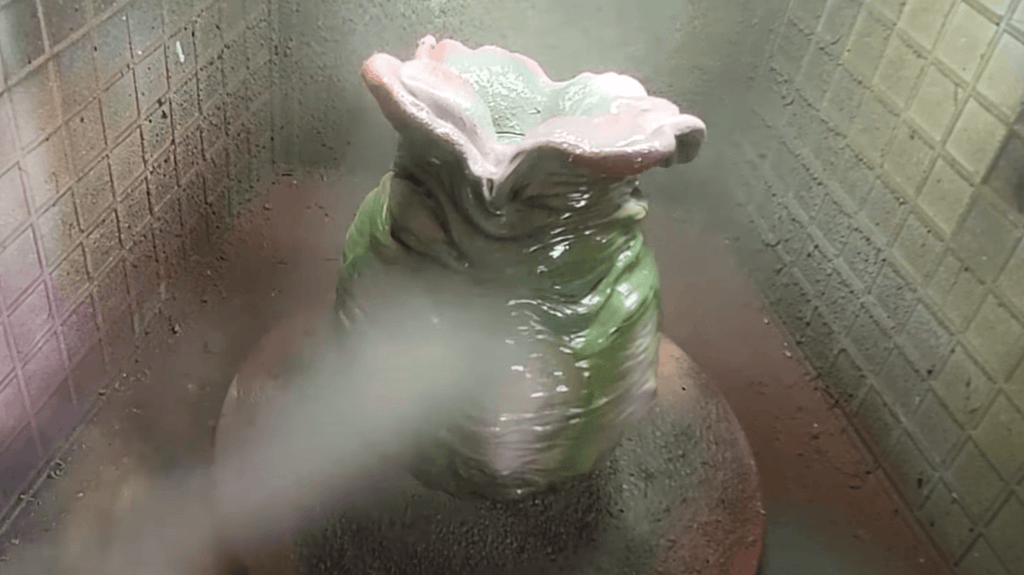
Creating a Wet Look: The same gloss varnish was used on the egg to achieve a wet and shiny appearance.
-
Finishing Touches:Desert Highlights paint, combined with dry brushing, completed the facehugger's painting.
-
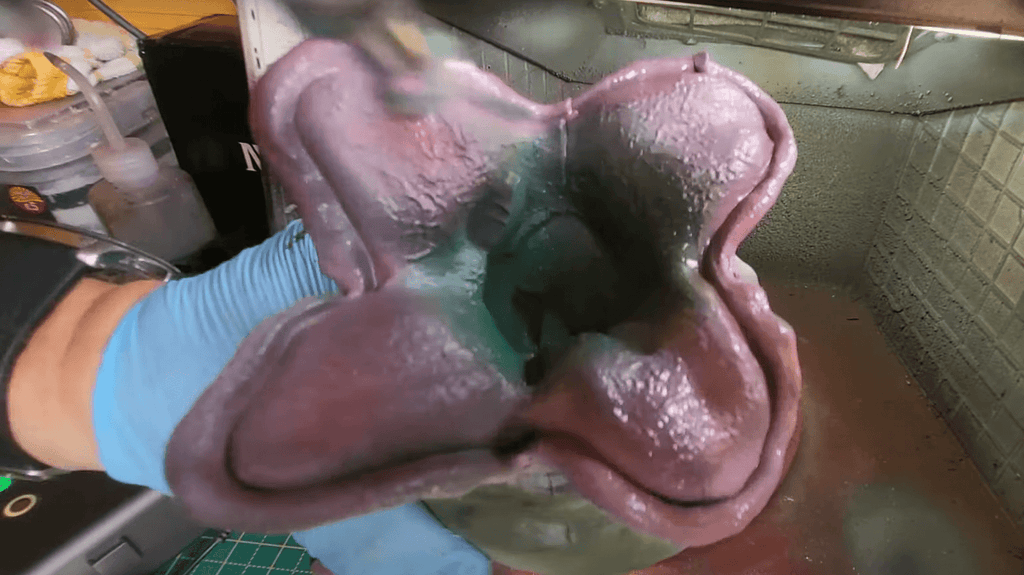
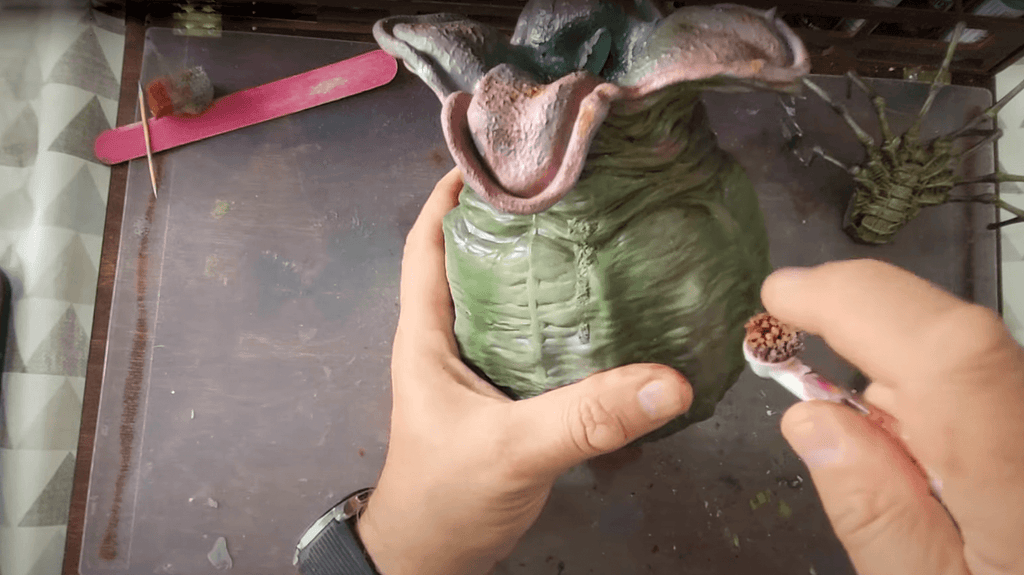
Create a speckled effect:Employing a stiff brush and immersing it in Martian brown paint. Proceed to flick this brown paint across the surface of the dried egg.
-
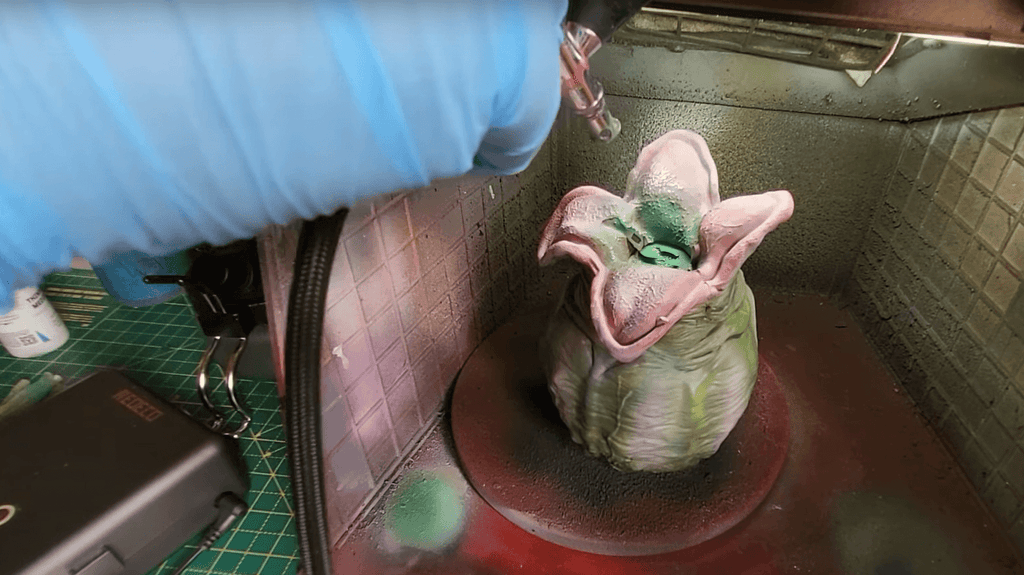
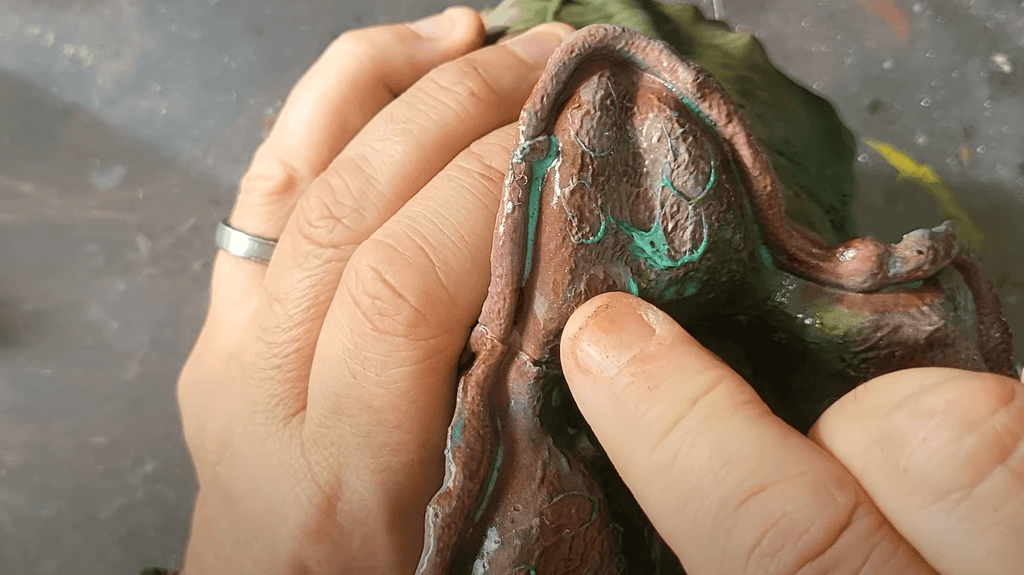
Liquid Mask:Liquid mask was applied liberally to the petals of the egg, creating a rubbery and membranous effect when peeled off.
-
Peeling Liquid Mask:The liquid mask on the egg was peeled away in patches, creating a membranous appearance.
-
Achieve a wet and glossy appearance: Gently apply a thin coat of gloss varnish, ensuring not to use an excessive amount, as it may impart a subtle pinkish hue.
-
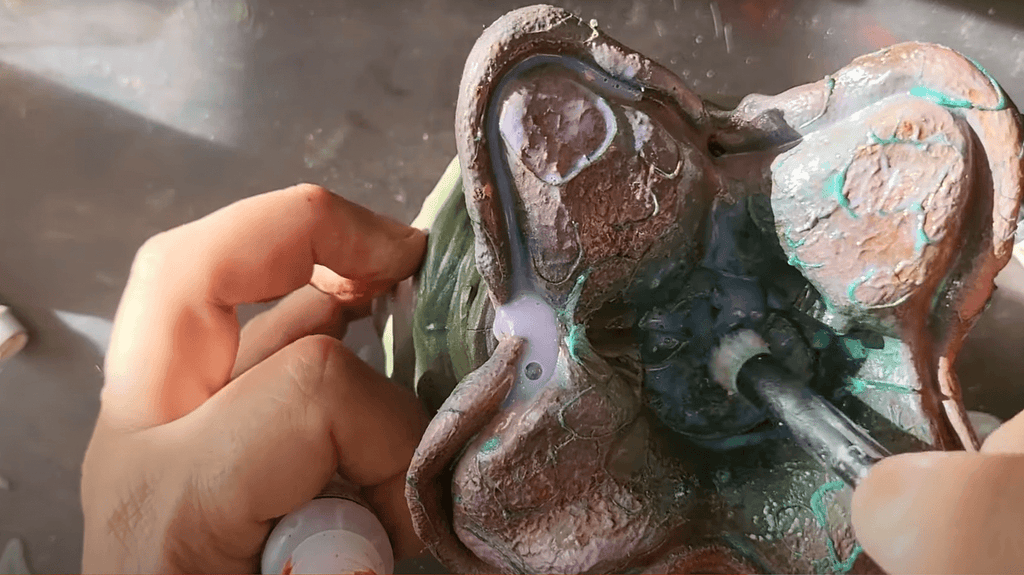
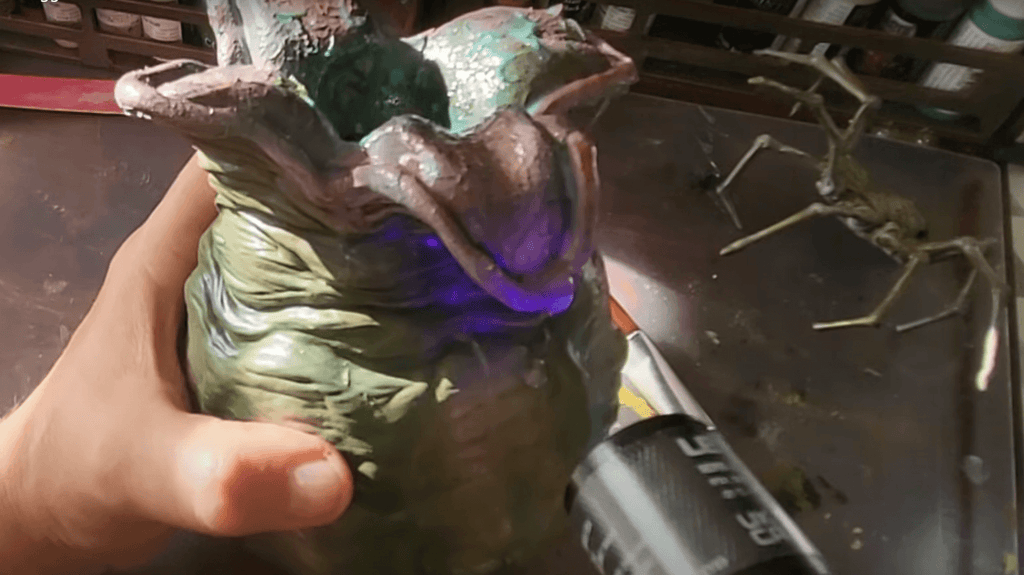
Simulating Slime: UV resin was used to create the appearance of slimy drool on the egg. The resin was allowed to drip naturally and solidified using a UV light.
-
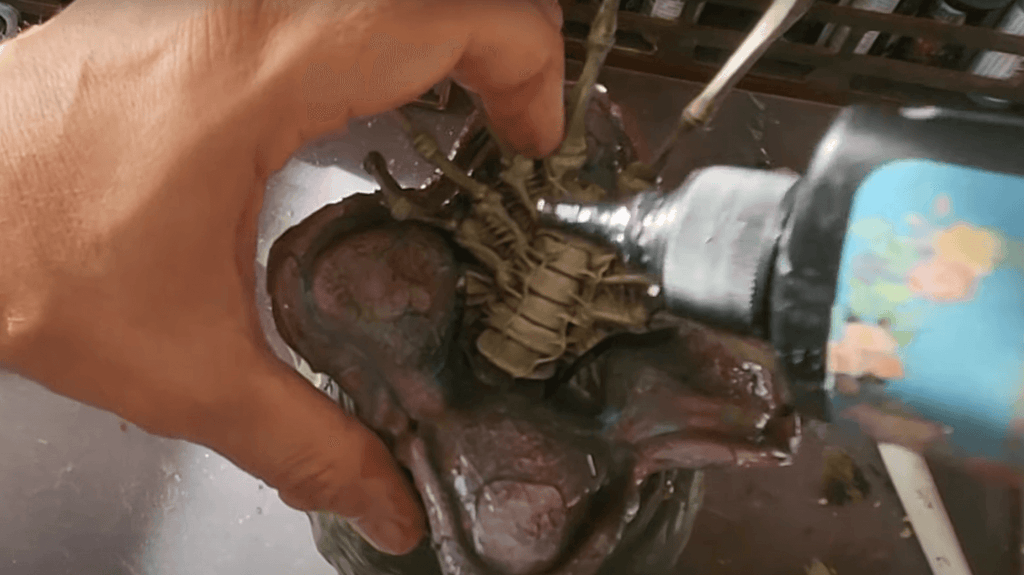
Securing the Facehugger:UV resin was used to attach the facehugger to the egg, blending the transition between the facehugger and the surrounding slime.
-
Adding More Slime: UV resin was applied to the facehugger to simulate additional slime and drool, solidifying it with a UV light.
This project showcased that with the right tools and techniques, remarkable 3D painting effects can be achieved easily. Greedy 3D's creative process demonstrated the potential of the Neoeco NCT-SJ83 airbrush and its compatibility with various paints and materials, making it accessible to artists looking to bring their visions to life.
(The original video was made by Greedy 3D on Youtube)